This blog post was published on Hortonworks.com before the merger with Cloudera. Some links, resources, or references may no longer be accurate.
This is part 1 of a 2 part series for how to update Hive Tables the easy way
Historically, keeping data up-to-date in Apache Hive required custom application development that is complex, non-performant and difficult to maintain. HDP 2.6 radically simplifies data maintenance with the introduction of SQL MERGE in Hive, complementing existing INSERT, UPDATE and DELETE capabilities.
This blog shows how to solve common data management problems, including:
- Hive upserts, to synchronize Hive data with a source RDBMS.
- Update the partition where data lives in Hive.
- Selectively mask or purge data in Hive.
In a later blog we’ll show how to manage slowly-changing dimensions (SCDs) with Hive.
The Basics: SQL MERGE, UPDATE and DELETE.
These SQL features are the foundation for keeping data up-to-date in Hadoop, so let’s take a quick look at them.
MERGE was standardized in SQL 2008 and is a powerful SQL statement that allows inserting, updating and deleting data in a single statement. MERGE makes it easy to keep two systems consistent. Let’s look at the SQL specification for MERGE (slightly simplified):
MERGE INTO <target table>
 USING <table reference>
ON <search condition>
 <merge when clause>...
WHEN MATCHED [ AND <search condition> ]
THEN <merge update or delete specification>
WHEN NOT MATCHED [ AND <search condition> ]
THEN <merge insert specification>
MERGE is so powerful because you can specify as many WHEN MATCHED / WHEN NOT MATCHED clauses as you want.
In this blog we’ll also use the more familiar UPDATE statement, which looks like this:
UPDATE <target table>
SET <set clause list>
[ WHERE <search condition> ]
Update comes into play when you don’t need to mix inserts and updates together in the same statement.
Get Ready to Keep Data Fresh
With HDP 2.6 there are two things you need to do to allow your tables to be updated.
First: you need to configure you system to allow Hive transactions. In Ambari this just means toggling the ACID Transactions setting on.
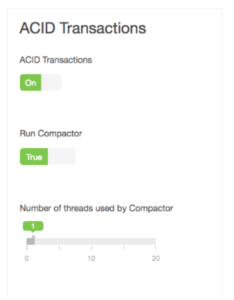
Second: Your table must be a transactional table. That means the table must be clustered, stored as ORCFile data and have a table property that says transactional = true. Here’s an example:
create table customer_partitioned
 (id int, name string, email string, state string)
 partitioned by (signup date)
 clustered by (id) into 2 buckets stored as orc
 tblproperties("transactional"="true");
Use Case 1: Hive Upserts
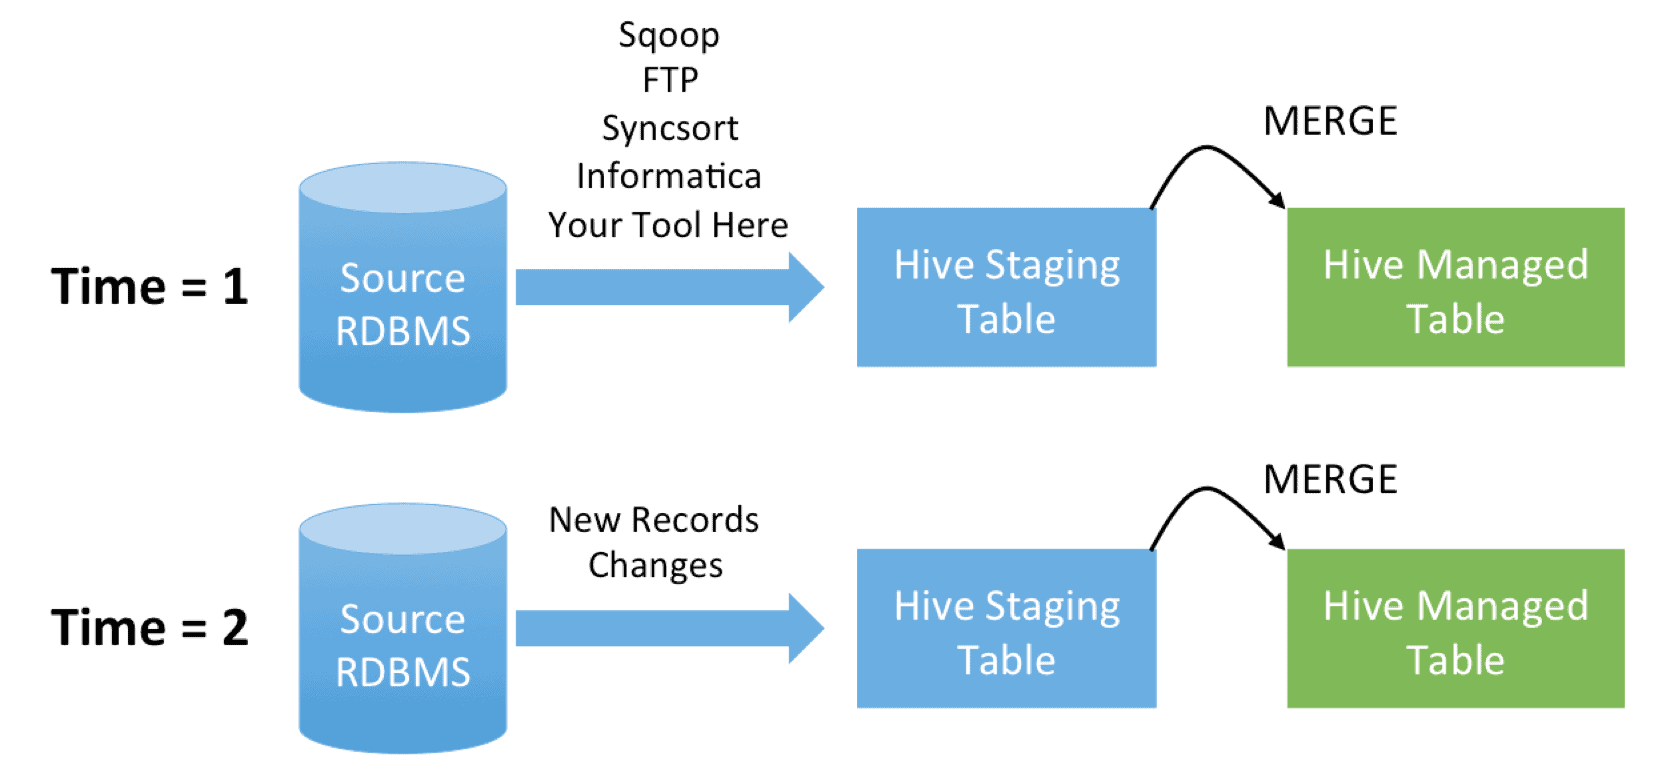
Suppose you have a source database you want to load into Hadoop to run large-scale analytics. Records in the source RDBMS are constantly being added and modified, and there’s no log to help you understand which records have changed. Instead to keep things simple you just do a full dump every 24 hours and update the Hadoop side to make it a mirror image of the source side.
Let’s create our managed table as follows:
create table customer_partitioned
(id int, name string, email string, state string)
 partitioned by (signup date)
 clustered by (id) into 2 buckets stored as orc
 tblproperties("transactional"="true");
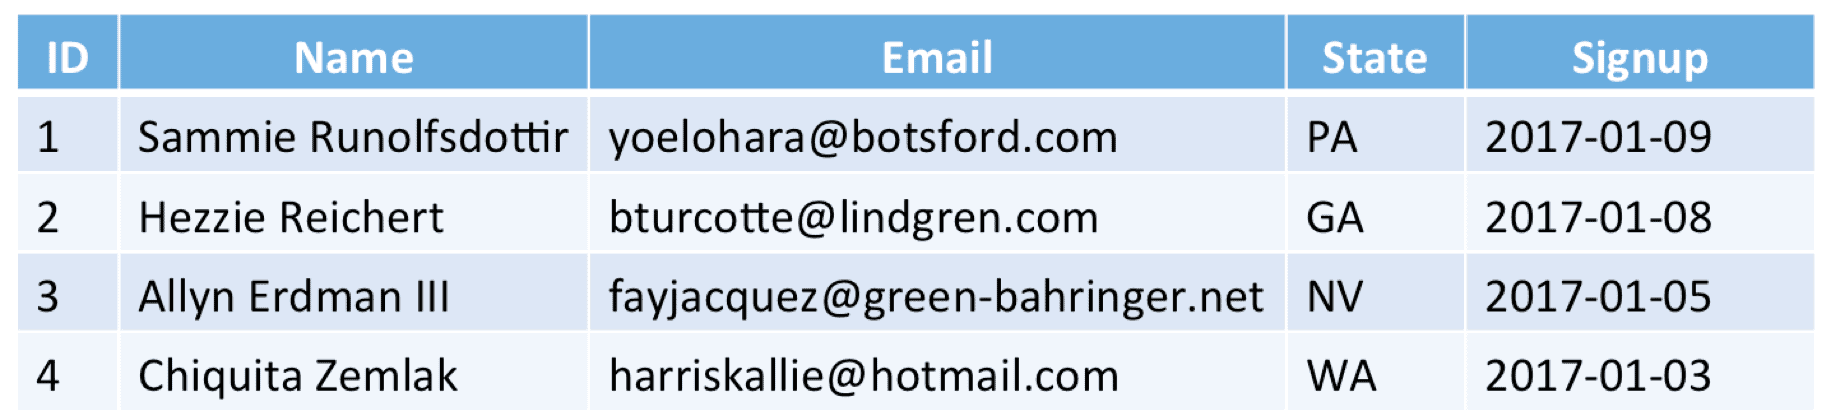
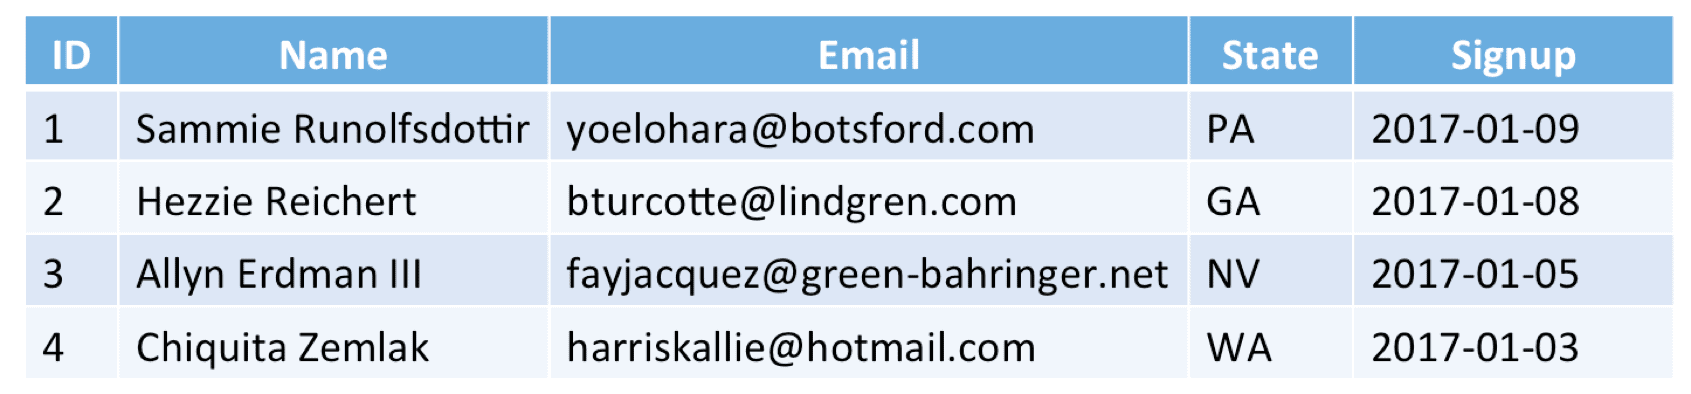
Suppose our source data at Time = 1 looks like this:
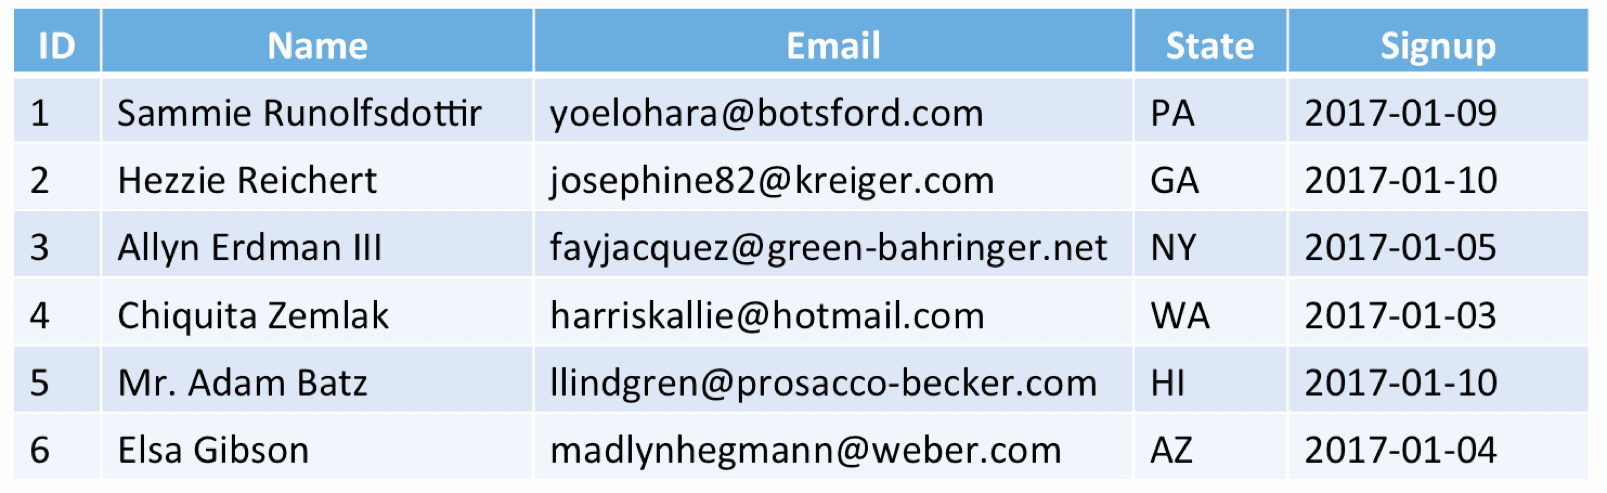
And the refreshed load at Time = 2 looks like this:
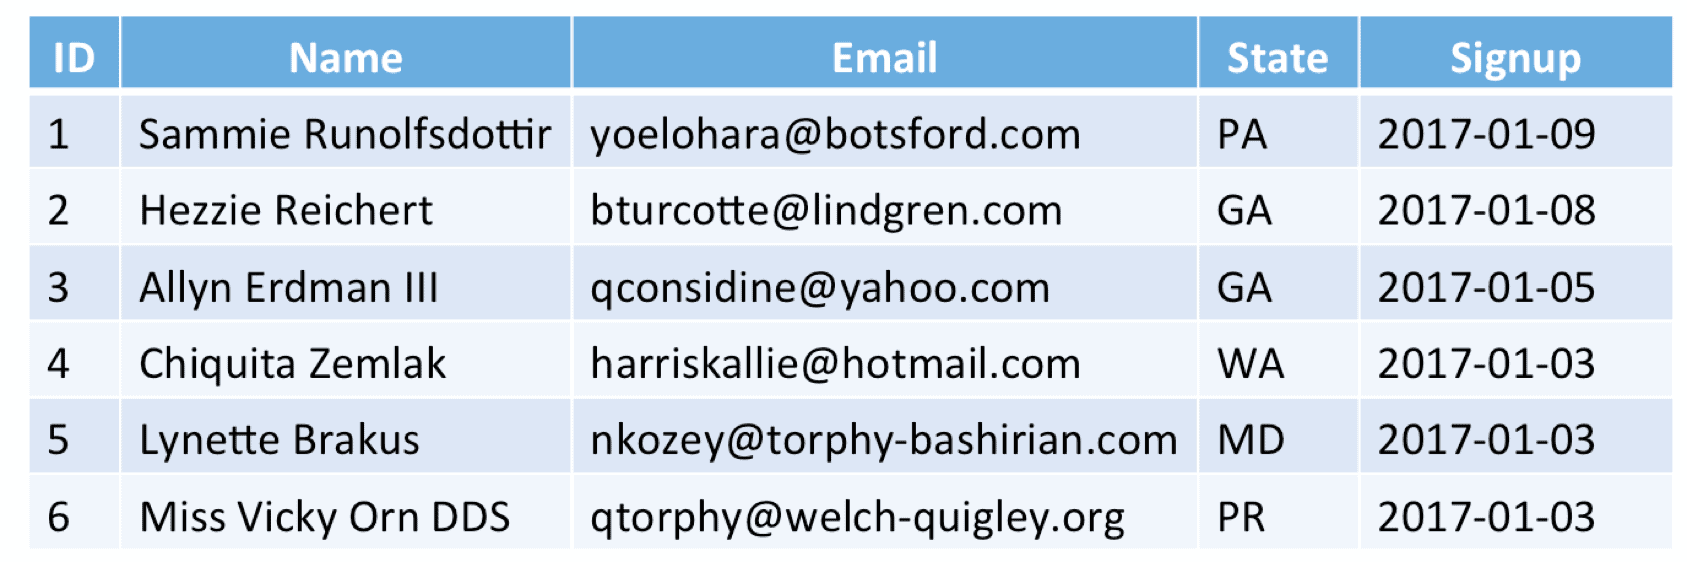
Upsert combines updates and inserts into one operation, so you don’t need to worry about whether records existing in the target table or not. MERGE is designed with this use case in mind and the basic usage is extremely simple:
merge into customer_partitioned
 using all_updates on customer_partitioned.id = all_updates.id
 when matched then update set
   email=all_updates.email,
   state=all_updates.state
 when not matched then insert
   values(all_updates.id, all_updates.name, all_updates.email,
   all_updates.state, all_updates.signup);
Notice we use both “when matched” and “when not matched” conditions to manage updates and inserts, respectively. After the merge process, the managed table is identical to the staged table at T = 2, and all records are in their respective partitions.
Use Case 2: Update Hive Partitions.
A common strategy in Hive is to partition data by date. This simplifies data loads and improves performance. Regardless of your partitioning strategy you will occasionally have data in the wrong partition. For example, suppose customer data is supplied by a 3rd-party and includes a customer signup date. If the provider had a software bug and needed to change customer signup dates, suddenly records are in the wrong partition and need to be cleaned up.
Suppose our initial data looks like this:
And our second load looks like this:
Notice that ID 2 has the wrong Signup date at T = 1, so is in the wrong partition in the Hive table. This needs to be updated somehow so that ID 2 is removed from partition 2017-01-08 and added to 2017-01-10.
Before MERGE it was nearly impossible to manage these partition key changes. Hive’s MERGE statement doesn’t natively support updating the partition key, but here’s a trick that makes it easy anyway. We introduce a delete marker which we set any time the partition keys and UNION this with a second query that produces an extra row on-the-fly for each of these non-matching records. The code makes the process more obvious:
merge into customer_partitioned
 using (
-- Updates with matching partitions or net new records.
select
  case
       when all_updates.signup <> customer_partitioned.signup then 1
       else 0
     end as delete_flag,
     all_updates.id as match_key,
     all_updates.* from
    all_updates left join customer_partitioned
   on all_updates.id = customer_partitioned.id
      union all

 -- Produce new records when partitions don’t match.
     select 0, null, all_updates.*
     from all_updates, customer_partitioned where
     all_updates.id = customer_partitioned.id
     and all_updates.signup <> customer_partitioned.signup
 ) sub
on customer_partitioned.id = sub.match_key
 when matched and delete_flag=1 then delete
 when matched and delete_flag=0 then
   update set email=sub.email, state=sub.state
 when not matched then
   insert values(sub.id, sub.name, sub.email, sub.state, sub.signup);
After the MERGE process the managed table and source table are synchronized, even though records needed to change partitions. Best of all this was done in a single operation with full atomicity and isolation.
Use Case 3: Mask or Purge Hive Data.
Let’s say your security office comes to you one day and says that all data from a particular customer needs to be masked or purged. In the past you could have spent hours or days re-writing affected partitions.
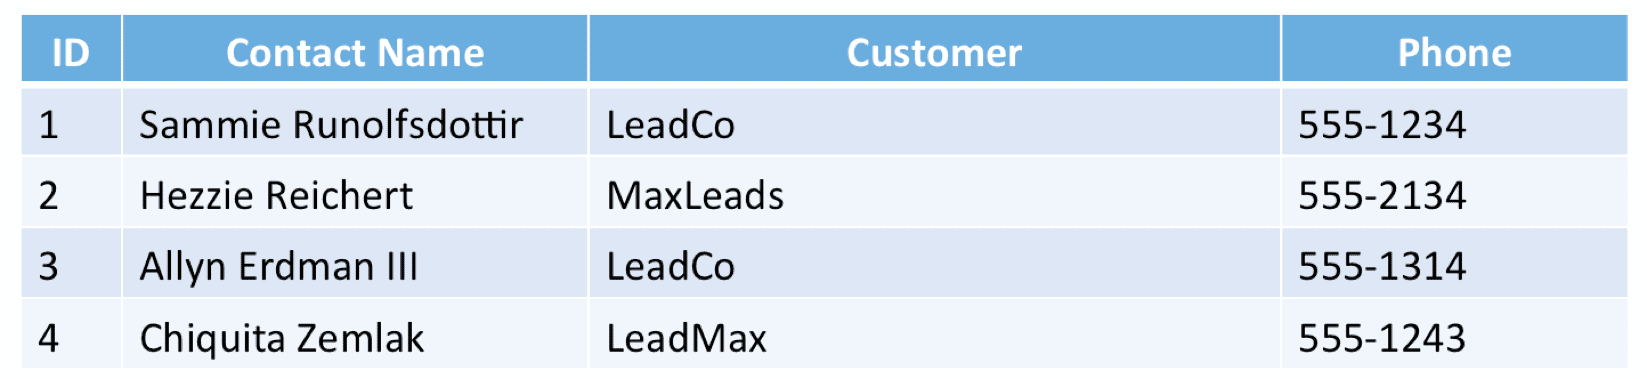
Suppose our contacts table looks like this:
And we created our table as follows:
create table contacts
 (id int, name string, customer string, phone string)
 clustered by (id) into 2 buckets stored as orc
tblproperties("transactional"="true");
The security office approaches us, asking for various actions:
Example: Mask all contact phone numbers from customer MaxLeads
Here we use Hive’s built-in masking capabilities (as of HDP 2.5 or Apache Hive 2.1)
update contacts set phone = mask(phone) where customer = 'MaxLeads';
Example: Purge all records from customer LeadMax
delete from contacts where customer = 'LeadMax';
Example: Purge records matching a given list of keys.
Suppose the security office gave us a CSV with certain keys and asked us to delete records matching those keys. We load the security office’s CSV into a table and get the list of keys using a subquery.
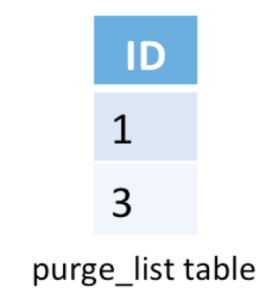
delete from contacts where id in ( select id from purge_list );
Conclusion:
Hive’s MERGE and ACID transactions makes data management in Hive simple, powerful and compatible with existing EDW platforms that have been in use for many years. Stay tuned for the next blog in this series where we show how to manage Slowly-Changing Dimensions in Hive.
Read the next blog in this series: Update Hive Tables the Easy Way Part 2
Editor's Choice